

How to Choose Between a 3-Jaw and 4-Jaw Chuck for a CNC Lathe?
Standing in front of the lathe with a workpiece in your hand. Picking the wrong chuck means you’ll either scrap the part or waste an hour trying to get it centered.
Use a 3-jaw chuck for fast, repetitive clamping of round or hexagonal stock. Choose a 4-jaw chuck for square, rectangular, or irregularly shaped parts, or when you need to achieve extremely high concentricity by manual adjustment.
A powerful spindle and sharp tools mean nothing if your workpiece isn’t held securely and accurately. The choice between a 3-jaw and a 4-jaw chuck is one of the most fundamental decisions a machinist makes every day. Getting it right is the first step to a good part. It’s not just about what fits; it’s about understanding how each chuck works and leveraging its unique strengths for the job at hand.
What Are the Core Mechanical Differences Between a 3-Jaw and a 4-Jaw Chuck?
You see three jaws moving together and four moving separately. What’s the actual mechanism inside that makes them so different and dictates their use?
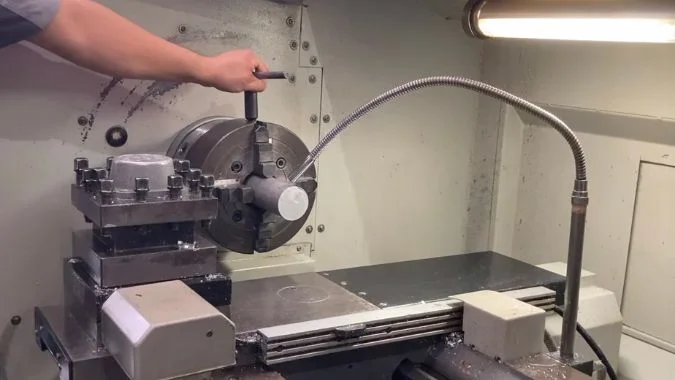
A 3-jaw chuck uses a scroll plate to move all jaws simultaneously for automatic centering. A 4-jaw chuck has four independent jaws, each moved by its own screw, requiring manual adjustment to center the workpiece.
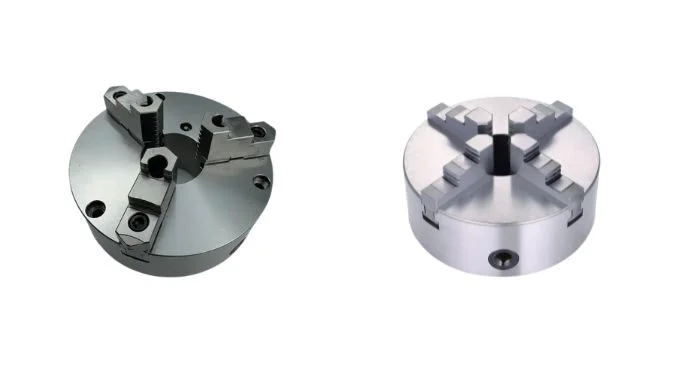
The magic of a 3-jaw chuck is its self-centering feature1. Inside the chuck body is a scroll plate, which has a spiral groove cut into it. When you turn the chuck key, you rotate this plate. The bottom of each jaw has teeth that engage with this spiral groove. As the plate turns, all three jaws are forced to move in or out along the spiral at the exact same time. This is what automatically centers your round workpiece.
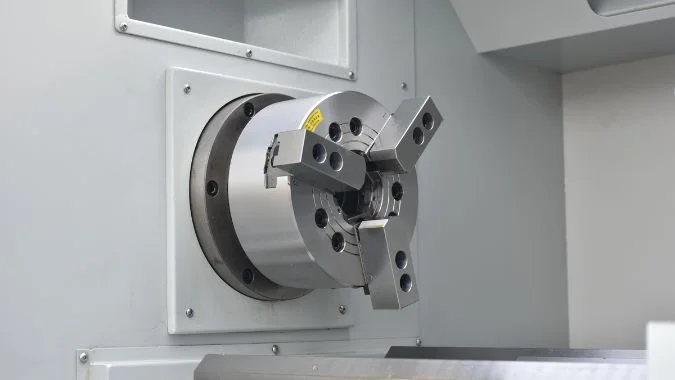
A 4-jaw chuck has a completely different design. It has no scroll plate. Each of the four jaws is mounted on its own individual screw. Turning the key in one socket only moves that one jaw. This independent movement is its greatest strength. It allows for superior stability2 and a stronger clamping force, especially for heavy or irregular parts. While this requires manual centering, it also provides the ultimate versatility for various shapes and even off-center work. It is less adaptable for automation but perfect for precision.
Why is a 3-Jaw Chuck the Standard for High-Speed, Repetitive Production of Round Parts?
Your shop has a big order of 1,000 identical round pins. You need to machine them as fast as possible. Why is grabbing the 3-jaw chuck a no-brainer for this job?
The 3-jaw chuck’s self-centering mechanism allows for incredibly fast and repeatable clamping. This drastically reduces setup time between parts, making it the ideal choice for high-volume production of symmetrical workpieces.
In production industries like automotive manufacturing, time is money. Every second of machine downtime is lost profit. The self-centering design of the 3-jaw chuck3 is the key to efficiency. An operator can unclamp a finished part and securely clamp new raw stock in seconds, not minutes. This rapid workpiece loading minimizes downtime and maximizes output. For a run of hundreds or thousands of identical round shafts or tubes, this time saving is enormous.
The process is simple and requires minimal skill, which reduces errors in a fast-paced environment. This consistency is critical. A good quality 3-jaw chuck offers excellent repeat accuracy4, often within 0.01mm, ensuring that every part in the batch is machined to the same standard. Its balanced grip is perfect for high RPMs. For any high-volume CNC operation involving cylindrical or hexagonal stock, the 3-jaw chuck is the undisputed king of speed and repeatability.
Why is a 4-Jaw Chuck Essential for Machining Square, Rectangular, or Irregularly Shaped Workpieces?
You have to turn a bearing journal on the end of a crankshaft, or face off a block of square steel. A 3-jaw chuck can’t even begin to hold these parts.
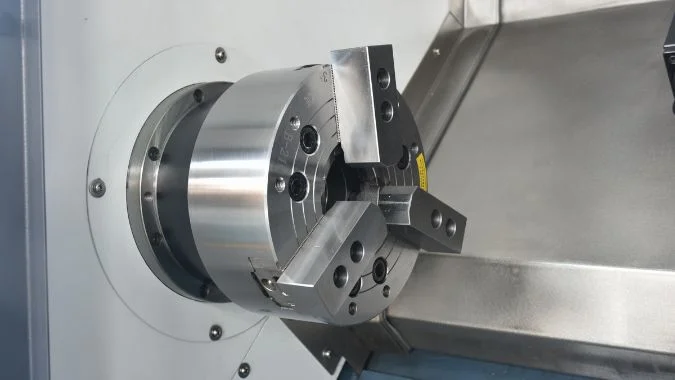
A 4-jaw chuck’s independently adjustable jaws give it the versatility to securely clamp non-symmetrical workpieces. It is the only way to hold square, rectangular, or completely irregular shapes on a lathe.
The independent jaws of a 4-jaw chuck5 are its superpower. For a square or rectangular part, you can precisely adjust two opposing jaws to clamp parallel faces, then secure the other two. The four contact points provide superior clamping force and balance, preventing any slippage, especially on heavy or uneven surfaces. This is critical for safety and accuracy.
This versatility goes beyond simple squares. It allows for dialing in exact centering with a dial indicator, minimizing runout to a degree a 3-jaw can’t match. More importantly, it allows for off-center or eccentric turning6. If you need to machine a cam lobe or an offset journal on a crankshaft, you must use a 4-jaw chuck to deliberately position the workpiece’s center of rotation away from its geometric center. Without a 4-jaw chuck, machining custom frames, fittings, or any non-round part with high precision is simply not possible.
What are the Differences in Setup Time and Operator Skill Required for Each Chuck Type?
You have a simple round part and a complex casting to machine. How does the choice of chuck affect the time it takes to get started and the experience needed to do it right?
A 3-jaw chuck requires a lower skill threshold and can be set up in seconds. A 4-jaw chuck demands a skilled operator and can take several minutes to set up, requiring careful manual centering with a dial indicator.
Setting up a 3-jaw chuck is fast. You insert the workpiece and tighten one key. The self-centering mechanism7 does the rest. The entire process takes seconds to a minute at most, making it perfect for quick changes in a production line. Because of its simplicity, it has a very low skill threshold. A new operator can learn to use it safely in minutes.
Setting up a 4-jaw chuck is a craft. It is a slower, more deliberate process that can take several minutes or longer. The operator must use a dial indicator8 to measure runout, then make precise, individual adjustments to each jaw to bring the workpiece perfectly on center. This process requires a higher skill level and a deep understanding of measurement and balancing. It is a task for an experienced machinist. This extended setup time makes it inefficient for batch production, but it’s this manual control that allows the 4-jaw to achieve superior accuracy and handle complex workpieces.
Conclusion
Use a 3-jaw chuck for speed and efficiency on standard round parts. Use a 4-jaw chuck for the precision, versatility, and clamping power needed for irregular shapes and high-accuracy jobs.
-
Understanding the self-centering feature can enhance your machining skills and improve workpiece accuracy. ↩
-
Exploring the concept of superior stability in 4-jaw chucks can help you choose the right tool for precision tasks. ↩
-
Explore this link to understand how a 3-jaw chuck enhances productivity and reduces downtime in manufacturing. ↩
-
Learn about the significance of repeat accuracy in manufacturing to ensure consistent quality and efficiency. ↩
-
Explore the benefits of a 4-jaw chuck to understand its critical role in achieving precision and safety in machining. ↩
-
Learn about eccentric turning to see how it enhances machining capabilities for complex parts and custom designs. ↩
-
Understanding self-centering mechanisms can enhance your machining skills and improve efficiency in setups. ↩
-
Learning to use a dial indicator is crucial for precision in machining, ensuring accuracy in your work. ↩

Chris Lu
Leveraging over a decade of hands-on experience in the machine tool industry, particularly with CNC machines, I'm here to help. Whether you have questions sparked by this post, need guidance on selecting the right equipment (CNC or conventional), are exploring custom machine solutions, or are ready to discuss a purchase, don't hesitate to CONTACT Me. Let's find the perfect machine tool for your needs.