

How to Handle Chip Wrapping During Profile Machining Operations?
That perfect profile cut is running, then you see it. A tangled "bird’s nest" of metal wraps around your tool. This mess can ruin your part, break expensive tooling, and halt production.
To handle chip wrapping, use tools with aggressive chip breakers, increase your feed rate to create thicker and more brittle chips, and apply high-pressure coolant directly at the cutting edge. Programming techniques like peck cycles or variable feed rates can also mechanically break long chips.

This problem feels random, but it’s not. It’s a direct result of your tools, parameters, and material interacting in a specific way. I’ve spent countless hours troubleshooting this exact issue on my shop floor. Understanding why it happens is the first and most important step to preventing it from ever stopping your machine again. Let’s break down the causes and the solutions.
Why Does Chip Wrapping Happen in Profile Machining?
Chip wrapping appears at the worst times, turning a good part into scrap. It can feel unpredictable and frustrating, making it hard to diagnose and fix on the fly.
Chip wrapping happens when chips are too long and stringy to evacuate the cutting zone properly. This is caused by a combination of factors: the wrong tool geometry, incorrect cutting parameters, insufficient coolant, and the properties of the material itself.
In my experience, chip wrapping is never caused by just one thing. It’s usually a perfect storm of several small issues. We can group these into a few key areas that you have direct control over. Once you know what to look for, the problem becomes much easier to solve. The goal is to make the chip curl tightly, break into small, manageable pieces, and get flushed away from the tool and the workpiece. When that process fails, you get a bird’s nest.
The Main Culprits of Chip Wrapping
- Unreasonable Tool Design1: The shape of your tool is critical. If the tool’s geometry, like its rake angle or cutting edge, isn’t designed for your material, it won’t be able to form a proper chip. Most importantly, a tool without an effective chip breaker won’t be able to curl the chip tightly enough to force it to break.
- Improper Cutting Parameters2: Your speeds and feeds directly control the chip’s thickness and shape. A feed rate that is too low or a cutting depth that is too shallow will create a thin, weak, ribbon-like chip. These long, stringy chips don’t have enough mass to break on their own.
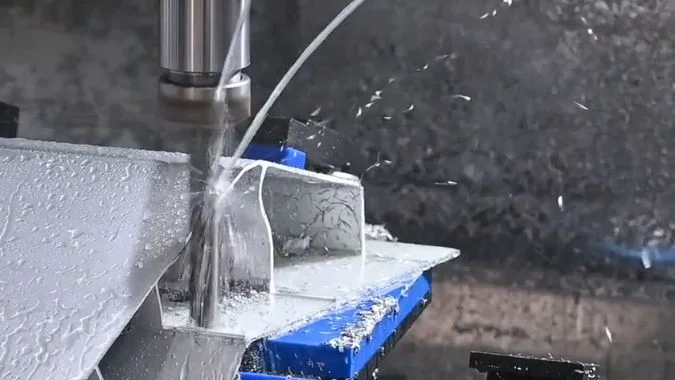
- Insufficient Coolant: Coolant does two things: it cools the cut, and it blasts chips away. If your coolant pressure is too low, or if the nozzle is aimed incorrectly, it can’t provide the force needed to push chips out of the way. This allows them to build up and eventually wrap around the tool.
What are the Root Causes of Stringy Chips in Aluminum and Other Ductile Materials?
You start a job on a soft material like aluminum, and instantly you get long, stringy chips. They are a nightmare to manage, wrapping around everything and creating a safety hazard.
Stringy chips form in ductile materials because these metals deform and tear rather than shearing off cleanly. This natural tendency is made worse by low feed rates, the wrong tool geometry (like low rake angles), and not using the right cutting fluid to reduce friction.
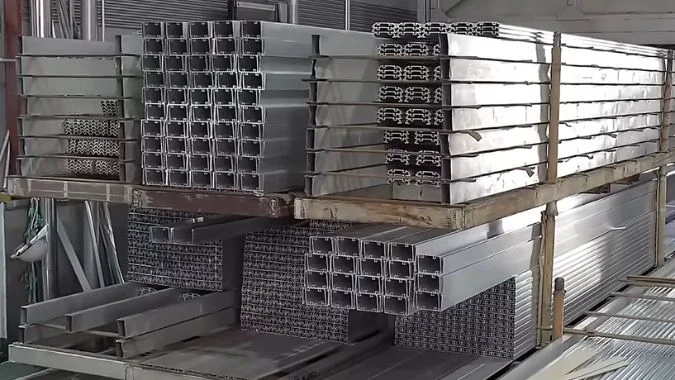
Ductile materials3 behave differently. "Ductile" means a material can stretch and deform a lot before it fractures. In machining, this means instead of a chip shearing off in a clean break, it gets peeled away in a long, continuous ribbon. Materials like aluminum alloys, copper, and some stainless steels are famous for this.
Why Ductile Materials Don’t Cooperate
The primary cause is the material’s low hardness and high ductility. When the cutting edge engages, the material flows up the tool face in a plastic state. It doesn’t have the brittleness needed to crack and break. This is often made worse by a few common mistakes:
- Low Feed Rate: Just like with other materials, a low feed rate on aluminum creates a thin chip that lacks the rigidity to break itself.
- Tool Geometry: For ductile materials, you need a very sharp tool with a high positive rake angle. This helps "slice" the material cleanly instead of pushing it. Using a general-purpose tool can make the problem much worse.
- Friction and Heat: Ductile materials can get sticky when they heat up in the cut. This causes the chip to adhere to the tool face, preventing it from flowing smoothly and breaking. Using a high-quality, water-soluble cutting fluid4 is essential to reduce this friction.
What Are the Effects of Chip Wrapping on Profile Machining Performance?
You see a small nest of chips on your tool and think it’s not a big deal. But ignoring it can lead to bigger problems. It can damage your machine, your part, and even become a safety risk.
Chip wrapping severely degrades machining performance. It ruins surface finish, causes dimensional inaccuracies, and accelerates tool wear, often leading to tool breakage. It also increases the load on the machine’s spindle and can create serious safety hazards for the operator.
I learned this the hard way. A small chip nest on a finishing tool got caught between the tool and the workpiece. It dragged across the surface, leaving a deep scratch and scrapping a part that was almost finished. Chip wrapping5 is not just an inconvenience; it has direct and costly consequences that ripple through your entire operation.
The Domino Effect of a Single Wrapped Chip
Here is a breakdown of the damage it can cause:
| Impact Area | Description |
|---|---|
| Machining Accuracy6 | Entangled chips create unstable cutting forces. This causes vibration and chatter, leading to a rough surface finish and parts that are out of tolerance. |
| Tool Life | The wrapped chips trap heat and create friction, rapidly wearing down the tool’s cutting edge. The unpredictable forces can also easily chip or break the tool insert, especially in hard materials. |
| Machine Tool Load | A large ball of chips significantly increases the cutting load. This puts extra strain on the spindle motor and bearings, which can lead to premature machine failure and costly maintenance. |
| Safety Hazards | A spinning nest of razor-sharp chips is dangerous. If it breaks free, it can be ejected from the machine. Operators can also get seriously cut when trying to remove the tangled mess by hand. |
How Can Chip Wrapping Be Prevented and Fixed in Profile Machining?
You are tired of stopping your machine to clear tangled chips. You need a reliable strategy to prevent wrapping from happening in the first place, saving you time, money, and frustration.
Prevent chip wrapping by optimizing your entire process. Start by choosing a tool with the correct geometry and chip breaker for your material. Then, adjust cutting parameters by increasing the feed rate and using programming tricks like peck cycles to break chips. Finally, ensure you have sufficient, well-aimed coolant.

Fixing chip wrapping is about being proactive, not reactive. You can’t just wait for it to happen and then clean it up. You need to build a process that is designed to create small, manageable chips from the very start. I tell my team to think of it as a checklist. If you are having chip problems, go through these steps one by one.
A Practical Checklist for Chip Control
- Optimize Tool Design7: This is your first line of defense. Make sure the tool’s geometry, coating, and especially its chip breaker are specifically designed for the material you are cutting. For ductile materials, use tools with a high positive rake and a very sharp edge.
- Adjust Cutting Parameters8: Don’t be afraid to increase the feed rate. A thicker chip is a more brittle chip. You can also vary the feed rate or cutting depth within a single pass. Sometimes a slight change is all it takes to disrupt the chip’s formation and force it to break.
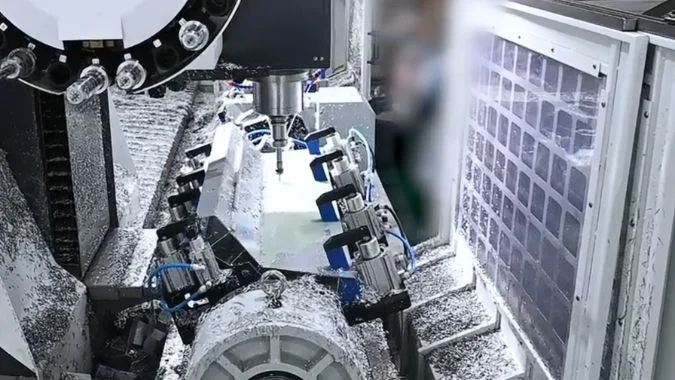
- Ensure Powerful Coolant: Use high-pressure, through-spindle coolant if possible. If not, position your coolant nozzles carefully to deliver a powerful stream directly at the point of the cut. This helps cool, lubricate, and physically blast the chips away.
- Improve Operating Procedures: Operators should always monitor for tool wear. A dull tool will produce stringy chips. Also, keep the machine’s chip evacuation system, like the conveyor, clean and in good working order to prevent chips from building up inside the machine.
Conclusion
To stop chip wrapping, focus on tool selection, aggressive feed rates, and high-pressure coolant. A proactive approach that addresses these key areas will solve the problem and keep your machines running smoothly.
-
Understanding tool design is crucial for preventing chip wrapping, ensuring efficient machining and better chip management. ↩
-
Exploring cutting parameters can help you optimize your machining process and avoid issues like chip wrapping. ↩
-
Understanding ductile materials is crucial for effective machining and material selection in engineering. ↩
-
Exploring the importance of cutting fluid can enhance your machining processes and improve tool life. ↩
-
Understanding chip wrapping is crucial for improving machining processes and preventing costly errors. ↩
-
Exploring machining accuracy can help enhance product quality and reduce waste in manufacturing. ↩
-
Exploring this resource will provide insights into effective tool design strategies that enhance chip control. ↩
-
This link will help you understand how minor adjustments can significantly impact chip quality and machining efficiency. ↩

Chris Lu
Leveraging over a decade of hands-on experience in the machine tool industry, particularly with CNC machines, I'm here to help. Whether you have questions sparked by this post, need guidance on selecting the right equipment (CNC or conventional), are exploring custom machine solutions, or are ready to discuss a purchase, don't hesitate to CONTACT Me. Let's find the perfect machine tool for your needs.